What is jQuery?
jQuery aims to make JavaScript more accessible for the less ‘hardcore’ developer. For example, there are many cross browser issues with regular JavaScript that jQuery deals with – it does a lot of work behind the scenes to make sure your experience is much more simple and enjoyable. Instead of spending time on the monotonous, boring cross-browser code, you can get straight to work with your cool effects, safe in the knowledge that jQuery is sorting everything out for you.
Before we can start using jQuery’s functions we need to include the source, that is the file containing the code which makes jQuery tick. You can do this in two ways. Firstly, you can download a copy from
jQuery and include it like so:
1 | <script type="text/javascript" src="path/to/jquery.min.js"> |
If you do it this way, be sure to download the minified version, as it reduces the strain on your server.
The second, and prefered way, is to include it from Google’s Content Delivery Network, or CDN for short. There are two main benefits to doing it this way. Firstly, we can make sure we are always using the most recent version of the library, and secondly it means your server does not have to load the file and it takes up less bandwidth. To include it from the CDN we use similar code to above:
That code will always load the most recent version of the library (well, until V2 is out), but you can be much more specific if you wish to and load a certain version:
Lets write some Code!
Now we now how to add jQuery to our page we can get writing some! You should include jQuery using one of the two techniques covered above just below the end tag on your page. This way, the file is loaded last, meaning that all the HTML content is loaded first, so we make sure the page’s look & content is loaded first. Below that, add the following code:
1 | <script type="text/javascript"></script> |
Inside those tags is where we will write our code. Before we start manipulating and interacting with elements, we will learn how to select elements. If you know CSS, it’s really easy. To select an element with jQuery, we use the $ symbol followed by parenthesis: $(‘your selector goes here’). That selector can be any valid selector, including new CSS3 selectors. For example, to select all divs on my page, it’s as simple as:
$(‘div’). A few more examples follow:
You can be as complex as you like: (Note: in the next article we will spend a lot of time looking at much more complex selectors)
jQuery’s selector engine is pretty much limitless and in the coming weeks you will learn to harness this and take full advantage. For now, lets keep it simple. In your page, create a new <div> element:
2 | <p>this is some text</p> |
And also add some CSS to it:
6 | border: 4px solid black; |
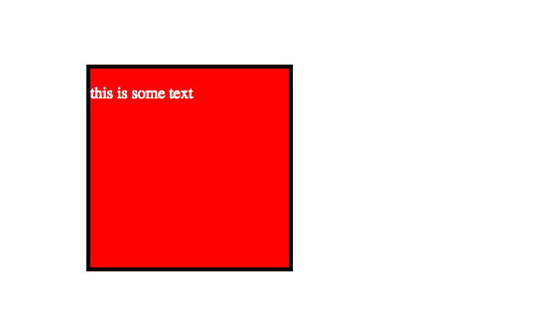
You should be left with something like this:

Make it Move
To end this lesson, we are going to make the div move slowly across the page. Firstly, using our selector knowledge, we can select it:
You could equally use $(‘div’) if you like, but personally I like to be as specific as I can. Once we have the element we can use jQuery’s animate() function to run our animation:
1 | $('#something').animate({'margin-top': '300px', 'margin-left': '400px'},1000); |
The animate function takes 3 main arguments, but one of them is optional:
1 | .animate(things to change, speed, callback); |
‘Things to Change’ are the properties of the element which we want to animate, in our case it’s the top and left margins. The way we add multiple properties is like so:
1 | .animate({'param': 'value', 'param2': 'value'}, speed, callback) |
After each set, you add a comma, apart from after the value of the very last property. ‘Speed’ is the speed at which the animation will run, or: ‘how long will it take before the animation is complete?’. This is in milliseconds (1000 = 1 second). ‘Callback’ is a function that runs after the animation is run. For now we are not using it, but it’s something we will utilise in the future. So, back to our animate() code:
1 | $('#something').animate({'margin-top': '300px', 'margin-left': '400px'},1000); |
We change the top margin of the element to 300, from 100, and the left margin is also increased. Open this page, and you should see a smooth animation over the course of a second: And there you have it!


No comments:
Post a Comment